
Product Description
The Permatex Windshield Repair Kit is a one-component system designed for car owners to repair bullseye damage up to 1 1/4 inches in diameter on laminated windshields. It is safe, easy to use, and requires no mixing or heat, making repairs virtually undetectable with a professional-quality finish.
Overview of the Permatex Windshield Repair Kit
The Permatex Windshield Repair Kit is a one-component system designed for car owners to repair bullseye damage up to 1 1/4 inches in diameter on laminated windshields. It is safe, easy to use, and requires no mixing or heat, making repairs virtually undetectable. The kit includes a resin syringe, curing bulb, and cleaning cloth, providing everything needed for a professional-quality fix. Its advanced spring-lock delivery system ensures precise application, while the UV resin cures with natural daylight, creating a permanent, airtight seal. This kit is ideal for DIY users seeking a quick, effective solution to prevent damage from spreading.
Key Features and Benefits
The Permatex Windshield Repair Kit offers a one-component system for easy, mess-free application. It requires no mixing or heat, making it safe and user-friendly. The kit includes a resin syringe, curing bulb, and cleaning cloth, providing everything needed for a professional-quality repair. Its advanced formula creates a permanent, airtight seal, preventing further damage and restoring clarity. The UV-cured resin ensures a strong bond with minimal visibility. Designed for DIY use, this kit is ideal for repairing bullseye damage up to 1 1/4 inches in diameter. It’s a cost-effective solution to avoid costly replacements and maintain windshield integrity.
Target Audience
Car owners, DIY enthusiasts, and drivers seeking a cost-effective solution for minor windshield damage. Ideal for those who want to repair chips or cracks without professional assistance.
Who Can Use the Permatex Windshield Repair Kit?
The Permatex Windshield Repair Kit is designed for car owners, DIY enthusiasts, and drivers seeking a cost-effective solution for minor windshield damage. It is ideal for individuals with basic tools and a willingness to follow step-by-step instructions. The kit is user-friendly, making it accessible to those without professional experience. It is particularly suitable for drivers who want to repair small chips or cracks before they spread, avoiding costly replacements. The kit is also a great option for budget-conscious individuals who prefer DIY solutions over professional services.
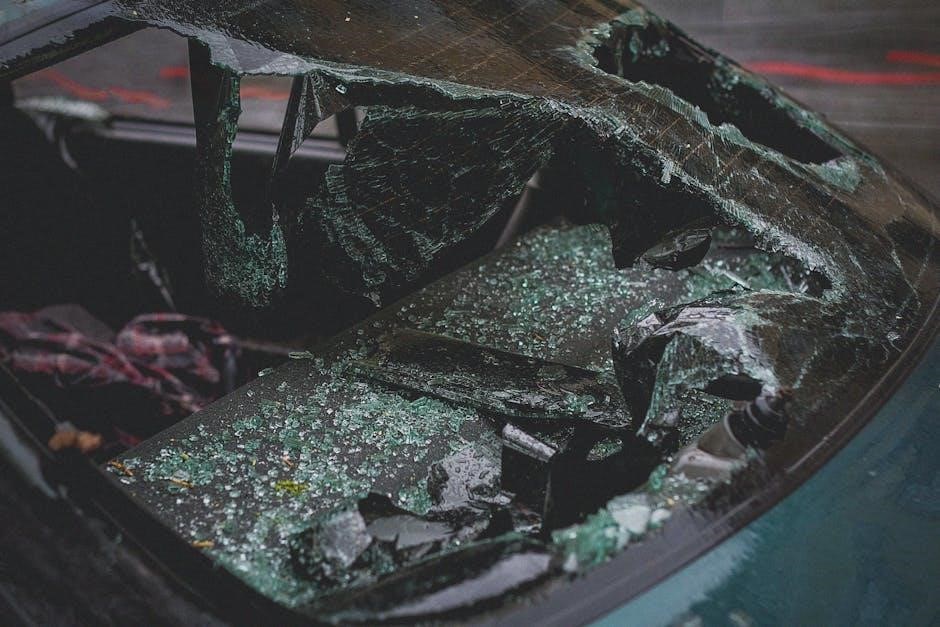
Types of Windshield Damage the Kit Can Repair
The Permatex Windshield Repair Kit is effective for repairing bullseye damage, chips, cracks, and star-shaped damage caused by rocks or debris. It is designed to fix damage up to 1 1/4 inches in diameter on laminated windshield glass. The kit works best on small, localized damage, creating an airtight seal to prevent further spreading. It is particularly suitable for minor impacts that have not penetrated the entire glass layer. This makes it an ideal solution for maintaining windshield integrity and improving visibility, ensuring safety on the road while avoiding costly replacements.
Safety Considerations
Wear eye protection and work in a shaded area. Ensure windshield temperature is between 50°F and 75°F. Avoid direct sunlight and prevent resin contact with painted surfaces.
Precautions Before Starting the Repair
Before using the Permatex Windshield Repair Kit, read all instructions carefully. Perform the repair in a shaded area, avoiding direct sunlight. Ensure the windshield temperature is between 50°F and 75°F (10°C to 25°C). Do not allow the resin to come into contact with the car’s finish or painted surfaces, as it may cause damage. Clean the damaged area thoroughly with the provided cleaning cloth to remove dirt or debris. The kit is designed for damages not exceeding 1 1/4 inches in diameter. Make sure the windshield is dry and free of contaminants for optimal results. Follow all safety guidelines to avoid complications.
Important Safety Tips
Always read and follow the instructions provided with the Permatex Windshield Repair Kit. Perform the repair in a shaded area, avoiding direct sunlight, and ensure the windshield temperature is between 50°F and 75°F (10°C to 25°C). Avoid allowing the resin to contact the car’s paint or finish, as it may damage the surface. Wear protective gloves and eyewear for safety. If unsure about the repair, consider seeking professional assistance. Keep the kit out of reach of children. Follow all safety guidelines to ensure a successful and safe repair process. Proper precautions will help achieve optimal results and prevent accidents.
Step-by-Step Instructions
Clean the windshield area thoroughly. Apply resin to the damage using the syringe, ensuring full penetration. Use the curing bulb to harden the resin under natural light. Inspect the repair for clarity and completeness, following the kit’s detailed instructions for optimal results.
Preparing the Windshield for Repair
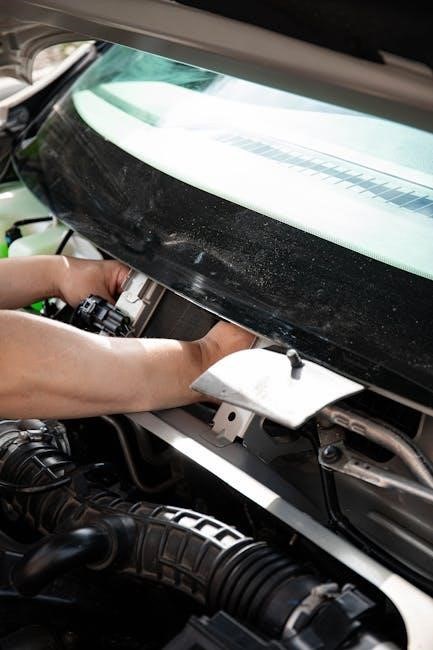
To ensure a successful repair, begin by cleaning the windshield thoroughly around the damaged area using the provided cleaning cloth. Remove any debris or dirt to ensure proper adhesion of the resin. Inspect the windshield for additional cracks or damage that may require attention. Perform the repair in a shaded area, avoiding direct sunlight, with the windshield temperature between 50°F and 75°F (10°C to 25°C). This ensures the resin adheres correctly. Protect the car’s painted surfaces from accidental resin contact, as it may cause damage. A clean, dry windshield is essential for the repair to be effective and long-lasting.
Applying the Resin
After preparing the windshield, insert the resin syringe into the applicator. Ensure no air bubbles are present by gently tapping the syringe. Apply the resin directly to the chip or crack, filling it completely without overfilling. Use a steady, gentle pressure to inject the resin, ensuring even distribution and avoiding air pockets. Avoid spilling resin on the car’s paint by protecting the area with tape or paper. Once applied, proceed to the curing process as instructed. Do not wipe away excess resin until after curing. Follow the recommended curing time and steps for a flawless repair.
Using the Curing Bulb
After applying the resin, use the curing bulb to harden it. Hold the bulb 6-8 inches away from the repair and slowly move it back and forth to ensure even curing. The UV light will harden the resin within 10-15 minutes, depending on the size of the damage. Avoid direct sunlight during this process. Once cured, the resin should be clear and firm. Do not touch the repaired area until fully cured, as the resin may still be tacky. Proper curing ensures a strong, durable repair. Follow the kit’s instructions for the exact curing time and technique.
Final Touches and Inspection
After curing, use the provided cleaning cloth to remove any excess resin from the windshield surface. Inspect the repaired area to ensure it is smooth and clear. If any small imperfections remain, gently polish with a clean, dry cloth. Avoid touching the repaired area until it is fully cured. Check for any air bubbles or unevenness, which may require additional resin application. Once satisfied, your windshield should be safe and ready for use. Proper inspection ensures the repair is durable and maintains your windshield’s structural integrity. Follow the kit’s instructions for any additional steps to complete the process effectively.
Drying and Curing Process
The Permatex Windshield Repair Kit uses a UV curing bulb to harden the resin. Allow 10-15 minutes for full curing, avoiding direct sunlight for best results.
Understanding the Curing Time
The Permatex Windshield Repair Kit cures using a UV curing bulb, typically taking 10-15 minutes for the resin to fully harden. For optimal results, avoid direct sunlight and ensure the windshield temperature is between 50°F and 75°F (10°C to 25°C). The one-component epoxy resin eliminates the need for mixing, simplifying the process. Allow the resin to cure completely before inspecting or using the vehicle. Proper curing ensures a clear, strong, and permanent repair. Always follow the kit’s instructions for precise curing times and conditions to achieve the best outcome.
Factors Affecting the Curing Process
Several factors influence the curing efficiency of the Permatex Windshield Repair Kit. Temperature plays a crucial role, with optimal curing occurring between 50°F and 75°F (10°C to 25°C). Direct sunlight should be avoided, as it may cause uneven curing. The cleanliness of the windshield surface is essential for proper resin adhesion. Humidity levels can slow down the curing process, while extreme temperatures may expedite or hinder it. The size and depth of the damage also impact curing time, as larger chips may require more resin and longer drying periods. Always follow the kit’s instructions for ideal conditions and best results.
Common Mistakes to Avoid
Common mistakes include not cleaning the windshield properly, applying too much resin, and curing in direct sunlight. These errors can lead to uneven repairs and reduced effectiveness.
Mistakes That Can Compromise the Repair
Common mistakes include improper cleaning of the damaged area, applying excessive resin, and curing the repair under direct sunlight. These errors can result in uneven repairs, air bubbles, and weakened bonds. Additionally, not following temperature guidelines or allowing resin to contact painted surfaces can damage the vehicle’s finish. Ensuring the windshield is dry and free of contaminants is crucial for a successful repair. Properly removing air bubbles and avoiding overfilling are also essential to achieve a professional-quality fix with the Permatex Windshield Repair Kit.
How to Correct Common Errors
To correct common errors, start by thoroughly cleaning the damaged area with the provided cleaning solution. If resin accidentally contacts painted surfaces, wipe it off immediately with a clean cloth. For air bubbles, use the syringe to gently remove excess resin and reapply as needed. Ensure the windshield is within the recommended temperature range (50°F to 75°F) for proper curing. Avoid direct sunlight during the repair process. If the repair is uneven, allow the resin to cure fully before lightly polishing with a fine-grit sandpaper. Follow the kit’s instructions carefully to achieve a smooth, professional finish.

Troubleshooting
Troubleshoot issues by checking for air bubbles, ensuring proper temperature, and avoiding direct sunlight. Consult the manual for detailed solutions to common repair problems.
Identifying and Solving Common Issues
Common issues during windshield repair include air bubbles, uneven resin flow, or incomplete curing. To address these, ensure the windshield is clean and dry before applying resin. If air bubbles form, gently tap the area with the applicator. For uneven flow, reapply resin and allow it to spread naturally. If curing is incomplete, check the temperature and ensure the curing bulb is used as instructed. Avoid direct sunlight and extreme temperatures, which can hinder the repair process. Consult the manual for detailed troubleshooting steps to achieve a smooth and effective repair.
When to Seek Professional Help
If the windshield damage exceeds 1 1/4 inches in diameter or is in the driver’s line of sight, professional repair is recommended. Additionally, if the repair kit fails to seal the damage or if the crack spreads after attempted repair, seek a professional. For deep or complex cracks that compromise windshield structural integrity, a professional service should be consulted. DIY kits like Permatex are effective for minor damage but may not address severe or large-scale issues, ensuring safety and visibility on the road.
Comparison with Professional Repairs
The Permatex Windshield Repair Kit offers a cost-effective, DIY solution for minor damage, while professional repairs provide expert handling of large or complex cracks and long-term warranties.
Advantages of Using the Permatex Kit
The Permatex Windshield Repair Kit offers convenience and effectiveness for DIY users. It requires no mixing or heat, making it easy to use and avoiding additional tools. The kit is ideal for small bullseye damages up to 1 1/4 inches, providing a permanent, air-tight seal. It is cost-effective compared to professional repairs and saves time by eliminating the need for shop visits. The kit is also portable, allowing repairs to be done anywhere. Its advanced spring-lock feature ensures professional-quality results, and the resin cures naturally, making it a practical solution for minor windshield damage without compromising safety or clarity.
When Professional Repair is Recommended
Professional repair is recommended for windshield damage exceeding 1 1/4 inches in diameter or for chips located in critical areas like the driver’s line of sight. If the damage has spread or is deep, the Permatex kit may not provide a reliable fix. Additionally, for multiple chips or cracks, professional technicians are better equipped to ensure safety and clarity. They use specialized tools and techniques to restore the windshield’s integrity, preventing further issues. While the Permatex kit is excellent for minor repairs, severe damage requires expert intervention to maintain vehicle safety and compliance with automotive standards.

Maintenance and Aftercare
After repairing, avoid washing the vehicle for 24 hours. Keep the windshield away from direct sunlight for 2 hours to ensure proper curing of the resin.
How to Care for the Repaired Windshield
To ensure the longevity of the repair, avoid direct sunlight on the windshield for at least 2 hours after the fix. Do not wash the vehicle for 24 hours. Use a microfiber cloth to clean the area gently, avoiding harsh chemicals or abrasive materials. Avoid using high-pressure washes near the repaired area for 48 hours. Regularly inspect the repair for any signs of damage or weakening. Proper care ensures the repair remains strong and maintains the windshield’s clarity and integrity over time.
Preventing Future Damage
To prevent future windshield damage, park your vehicle in shaded areas to avoid sun exposure, which can weaken the glass over time. Use a windshield cover to protect against debris and extreme temperatures. When driving, maintain a safe distance from trucks or vehicles that may kick up rocks. Regularly inspect your windshield for minor chips or cracks and address them immediately. Avoid sudden temperature changes, such as using hot water on a cold windshield. Lastly, consider applying a hydrophobic coating to repel water and improve visibility during rain. These steps help maintain your windshield’s integrity and prevent costly repairs.
Customer Reviews and Feedback
Customers praise the Permatex Windshield Repair Kit for its ease of use and effectiveness in repairing minor chips and cracks, often preventing further damage and saving costs.
What Users Are Saying About the Kit
Users overwhelmingly praise the Permatex Windshield Repair Kit for its ease of use and effectiveness. Many highlight its ability to repair bullseye chips and small cracks effortlessly, saving time and money. Several customers mention that the kit is a great alternative to professional repairs, delivering professional-quality results at home. The user-friendly design and clear instructions are frequently commended, making it accessible even for those with no prior experience. Some users note that while it works well for minor damage, larger cracks may still require professional attention. Overall, the kit is highly recommended for its efficiency and cost-effectiveness in addressing common windshield issues.
Success Stories and Case Studies
A Subaru owner successfully repaired a bullseye chip using the Permatex kit, restoring clarity and preventing further damage. Many users report professional-quality results, with repairs often being nearly invisible. A driver with a star-shaped crack achieved a flawless fix, improving visibility and safety. Customers consistently praise the kit for its ease of use and effectiveness in addressing minor damage. Several case studies highlight its ability to save money by avoiding costly professional repairs. The kit’s success lies in its simplicity and reliability, making it a trusted solution for DIY windshield repairs and a cost-effective alternative to traditional methods.
The Permatex Windshield Repair Kit is a cost-effective, user-friendly solution for minor windshield damage, offering professional-quality results and long-term durability, making it a valuable investment for car owners.
Final Thoughts on the Permatex Windshield Repair Kit
The Permatex Windshield Repair Kit is a highly effective solution for minor windshield damage, offering a professional-quality finish without the need for specialized tools or expertise. Its ease of use, combined with the ability to make nearly undetectable repairs, makes it an excellent choice for car owners seeking a cost-effective and efficient DIY option. With its advanced spring-lock feature and UV-curing resin, it provides a permanent and air-tight seal, ensuring safety and clarity. Overall, it is a valuable investment for anyone looking to address windshield damage promptly and effectively.
Is the Kit Worth the Investment?
The Permatex Windshield Repair Kit is a cost-effective solution for minor windshield damage, offering significant savings compared to professional repairs. Its ease of use, durability, and professional-quality results make it a valuable investment for car owners. The kit’s ability to prevent damage from spreading ensures long-term savings and maintains windshield clarity. With its user-friendly design and comprehensive instructions, it provides a reliable DIY option that delivers excellent value for money. For those seeking a convenient and efficient repair solution, the Permatex Windshield Repair Kit is a worthwhile investment.
FAQs
Q: How long does the Permatex Windshield Repair Kit take to cure?
The kit cures quickly, typically within minutes, using UV light for a strong, permanent bond, making it a convenient solution for drivers needing fast repairs.
Frequently Asked Questions About the Kit
Q: What types of damage can the Permatex Windshield Repair Kit repair?
It repairs bullseye chips, cracks, and star damage up to 1 1/4 inches in diameter on laminated windshield glass.
Q: How long does the repair take?
The process is quick, typically completed in minutes, with the resin curing under UV light for a permanent bond.
Q: Is the kit suitable for all vehicles?
Yes, it works on most laminated windshields, but ensure compatibility with your vehicle’s glass type before use.
Q: What is included in the kit?
The kit includes a resin syringe, curing bulb, cleaning cloth, and detailed instructions for a complete DIY repair solution.
Additional Tips for Optimal Results
Perform the repair in a shaded area to avoid direct sunlight, as it can interfere with the resin application.
Ensure the windshield temperature is between 50°F and 75°F for optimal resin curing.
Avoid touching the resin with bare hands to prevent contamination and ensure a clean repair.
Use the included curing bulb as directed to achieve a professional-quality finish.
Inspect the repair immediately after curing to ensure no air bubbles or imperfections remain.
Refer to the instruction manual for troubleshooting if issues arise during the process.
Store the kit in a cool, dry place to maintain the integrity of the resin for future use.
By following these tips, you can achieve a flawless, long-lasting repair with the Permatex Windshield Repair Kit.