
A 16×20 pergola is a spacious, freestanding structure perfect for outdoor entertaining, offering shade and style. Its large size makes it ideal for backyard gatherings and creating a focal point in your landscape.
What is a Pergola?
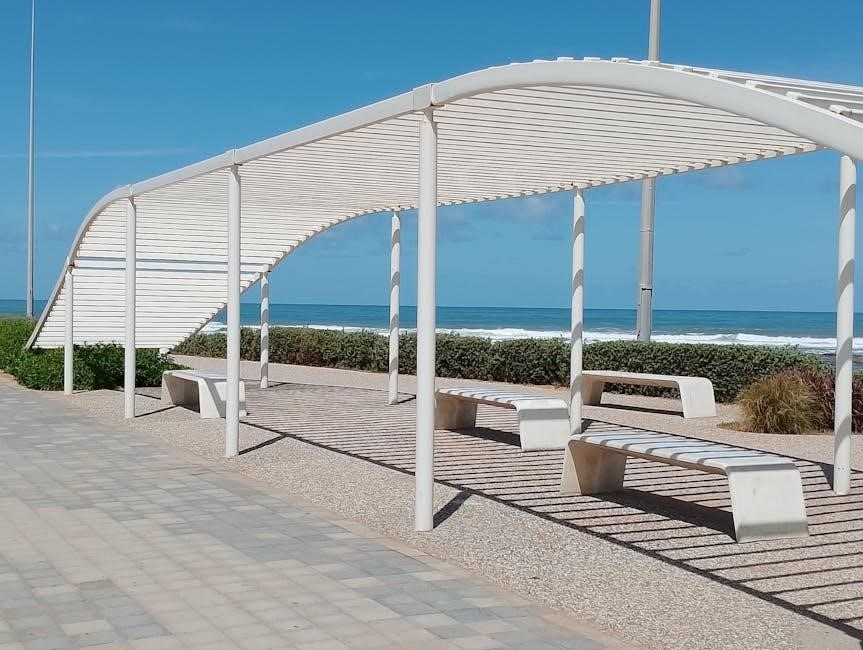
A pergola is an open-frame garden structure with vertical posts and horizontal beams, often used to create shade, beauty, and support for climbing plants. Its design is versatile, making it suitable for various outdoor settings, from modern patios to traditional gardens, offering both functional and aesthetic benefits while enhancing outdoor spaces.
Benefits of a 16×20 Pergola
A 16×20 pergola provides ample shade, enhancing outdoor comfort and entertainment. Its spacious design accommodates large gatherings, making it ideal for hosting events. It adds aesthetic value to landscapes, supports vines or plants, and can include optional features like canopies or privacy walls, offering functionality and beauty for a grander outdoor living experience while increasing property appeal.
Materials and Tools Needed
Building a 16×20 pergola requires lumber, brackets, screws, and tools like drills and saws. Precise materials ensure stability and durability, while proper tools facilitate smooth assembly and construction.
Lumber Requirements
For a 16×20 pergola, posts are typically made from 6×6 or 4×4 lumber, while double support beams use 2×12 boards. Shade elements often require 2×8 lumber. Ensure all wood is pressure-treated or naturally rot-resistant for durability. Proper sizing and quality of lumber are crucial for structural integrity and longevity of the pergola.
Hardware and Fasteners
Stainless steel screws and brackets are essential for securing the pergola’s frame. Use 4×4 or 6×6 pergola bracket kits, including corner and post base brackets. Ground fasteners like anchor kits ensure stability. Lag screws and washers are recommended for added strength. Proper hardware ensures durability and weather resistance, especially for outdoor structures exposed to the elements.
Essential Tools
Building a 16×20 pergola requires a power drill, impact driver, circular saw, and measuring tape for precise cuts. A ladder or step stool is needed for elevated work. Clamps will help hold beams in place, while a wrench and socket set are necessary for securing hardware. Ensure all tools are in good condition for efficient assembly and construction.
Step-by-Step Guide
Start by assembling the roof frame on the ground using brackets and beams. Attach vertical posts to the base brackets, then raise and secure the roof structure. Finally, anchor the pergola to the ground for stability and safety.
Planning and Preparation
Begin by verifying the pergola design matches your desired style and dimensions. Choose between 4×4 or 6×6 posts for durability. Measure and mark the installation site, ensuring a level surface. Gather all materials, including lumber, brackets, and fasteners. Prepare tools like a drill, saw, and wrench. Plan the assembly sequence, starting with the roof frame. Ensure safety by wearing protective gear and having helpers available. Allocate about 2 hours for completion.
Building the Frame
Start by assembling the roof structure on the ground. Lay out the 16-foot width beams and 20-foot depth beams, attaching them with 3-arm brackets. Secure each beam using stainless steel screws, ensuring the brackets are correctly aligned. Once the roof frame is complete, move on to attaching the vertical posts to the brackets, forming the pergola’s sides. This step ensures a sturdy base for the entire structure.
Assembling the Roof
Lay the 16-foot width beams and 20-foot depth beams on the ground. Attach 3-arm brackets to both ends of each beam, securing them with screws. Ensure the brackets with fewer holes face downward. If adding shade canopies, leave specific holes open. Once beams are connected, the roof frame is ready for vertical post attachment, completing the structure’s top section.
Installing the Pergola
Position the assembled pergola frame in your desired location. Ensure it is level and secure each post base bracket to a concrete footing or slab using ground fasteners. Drill holes for anchors and tighten them firmly. Double-check the structure’s stability and adjust if necessary. Once anchored, your pergola is ready for additional features like privacy walls or shade canopies.
Design Considerations
Choose a style that complements your yard, such as modern or traditional. Consider adding roof slats or canopies for shade and privacy walls for seclusion. Customize to enhance aesthetics.
Choosing the Right Style
Selecting the right style for your 16×20 pergola is crucial. Consider modern designs with sleek lines or traditional options with intricate details. Think about the architecture of your home and the vibe you want to create. Adding features like roof slats or canopies can enhance functionality. Ensure the style aligns with your yard’s aesthetic for a cohesive look. Customize to reflect personal taste and outdoor decor preferences.
Understanding Size and Dimensions
A 16×20 pergola offers ample space for outdoor entertaining or relaxation. Its dimensions provide a generous footprint, making it ideal for covering seating areas or creating shade. The size ensures durability and stability, while the proportions can complement various yard layouts. Understanding these measurements is key to ensuring the pergola fits seamlessly into your outdoor space and meets your functional needs.
Budget and Cost Estimation
Building a 16×20 pergola can cost between $621 and $1,182, depending on materials like 4×4 or 6×6 lumber. Additional features increase expenses, while DIY saves labor costs.
Material Costs
Material costs for a 16×20 pergola range from $621 to $1,182, depending on lumber size (4×4 or 6×6). Additional features like roof slats or privacy walls require extra materials, increasing expenses. Ensure accurate measurements to avoid wasted wood and extra costs. Prices vary based on wood type and local availability. Plan carefully to stay within budget.
Labor Costs
Labor costs for a 16×20 pergola are minimal if you opt for a DIY approach, as the project is designed for simplicity. Hiring a professional may add $300–$500 to the total cost, depending on location and complexity. Assembly typically takes 2 hours, making it a cost-effective option for those with basic DIY skills.
DIY vs. Pre-Made Kits
DIY pergola kits offer cost savings and customization, while pre-made kits provide convenience and professional results. Choose based on your skills, time, and desired outcome.
Pros and Cons of DIY
DIY pergola projects offer customization and cost savings but require time and carpentry skills. While rewarding, they can be time-consuming and may lead to errors for inexperienced builders.
Advantages of Pre-Made Kits
Pre-made pergola kits offer convenience and ease of installation, with detailed plans and hardware included; They save time and reduce errors, ideal for DIY enthusiasts. Kits are customizable, come in various designs, and often include expert support, ensuring a professional finish without the hassle of sourcing materials separately.
Customization Options
Enhance your pergola with roof slats, canopies, or privacy walls to improve functionality and style. These additions provide shade, seclusion, and a personalized touch to your outdoor space.
Adding Roof Slats or Canopies
Roof slats or canopies can be added to your 16×20 pergola for enhanced shade and aesthetic appeal. Slats provide filtered sunlight, while canopies offer full coverage. Both options are easy to install using additional lumber and hardware. Ensure measurements align with your pergola’s design for a seamless integration. This customization transforms your pergola into a cozy retreat, perfect for outdoor relaxation and entertaining.
Incorporating Privacy Walls
Incorporating privacy walls into your 16×20 pergola enhances seclusion and style. These walls can be added to one or more sides, using kits or additional lumber like 2x4s or 2x6s. Ensure accurate measurements and alignment for a seamless look. Follow specific installation instructions for a sturdy and attractive privacy solution. Learn more.
Necessary Skills and Experience
Building a 16×20 pergola requires basic carpentry skills, including measuring, cutting, and assembling lumber. Proficiency with tools like saws and drills is essential. Prior experience with DIY projects is beneficial but not mandatory, as detailed plans can guide novice builders through the process. Learn more.
Carpentry Skills
Building a 16×20 pergola requires strong carpentry skills, including accurate measuring, cutting, and assembling lumber. Proficiency with power tools like saws and drills is essential. Experience in framing and structural assembly is beneficial. Novice builders can still succeed by following detailed plans, but basic woodworking knowledge is recommended to ensure a sturdy and visually appealing structure. Learn more.
Tools Proficiency
Proficiency with basic tools like drills, saws, and wrenches is crucial for assembling a 16×20 pergola. A cordless drill ensures secure fastening, while a circular or miter saw is essential for precise lumber cuts. Measuring tapes and levels guarantee accuracy. Sanding tools may also be needed for smoothing wood surfaces. Familiarity with these tools ensures a sturdy and properly aligned structure.

Safety Precautions
Ensure a stable base and use proper fasteners to prevent collapse. Wear protective gear and avoid power tools near water. Always maintain ladder safety and balance while building.
General Safety Tips
Always plan carefully to identify potential hazards. Wear protective gear like gloves and safety glasses. Ensure the base is stable before building. Use proper ladder safety and maintain three points of contact. Avoid using power tools near water or in wet conditions. Keep children and pets away from the work area. Regularly inspect tools and materials for damage. Work with a partner when lifting heavy materials or using ladders.
Specific Safety Measures
Ensure all power tools are properly grounded and avoid overreaching. Use clamps to secure wood during cutting or drilling. Check for underground utilities before digging. Use anchor kits to secure posts firmly to prevent collapse. Avoid building in windy conditions. Double-check all connections and brackets for tightness before finalizing. Ensure the structure is level to prevent instability. Regularly inspect for any loose screws or weaknesses.
Where to Find the Best Plans
Download free 16×20 pergola plans PDF from trusted DIY websites or purchase detailed kits from platforms like ZenPergolas. Ensure plans match your pergola style and dimensions.
Free PDF Plans Online
Download free 16×20 pergola plans PDF from websites like ZenPergolas or DIY platforms. These plans include 3D diagrams, shopping lists, and step-by-step instructions. They cater to various styles, ensuring a perfect fit for your outdoor space. Ideal for DIY enthusiasts, these resources simplify the building process with detailed guides and video tutorials for a successful project.
Paid vs. Free Plans
Free 16×20 pergola plans PDF offer basic designs and essential instructions, ideal for DIY enthusiasts. Paid plans provide detailed customization, advanced features, and professional support. Free plans are perfect for simple builds, while paid options suit complex projects. Choose based on your needs and expertise, ensuring the plan aligns with your pergola goals. Both options are available online from trusted sources like ZenPergolas.