The Permatex Windshield Repair Kit offers a convenient, cost-effective solution for minor windshield damage, providing professional-looking results with easy-to-follow instructions and essential tools for DIY repairs.
1.1 What is the Permatex Windshield Repair Kit?
The Permatex Windshield Repair Kit is a DIY solution designed to fix minor windshield damage, such as chips and small cracks, before they escalate. It includes a syringe, adhesive disc, curing strip, and repair compound, providing everything needed for a quick, professional-quality repair. The kit is user-friendly, requiring no mixing or heat, and cures naturally with UV light. It’s an affordable alternative to professional services, ideal for addressing bullseyes, star damage, and small cracks up to 1.25 inches in laminated glass windshields.
1.2 Importance of Timely Windshield Repair
Timely windshield repair is crucial to prevent minor chips or cracks from spreading into larger, costly damages. Environmental factors like temperature fluctuations and moisture can exacerbate cracks, leading to expensive replacements. Addressing damage promptly ensures optical clarity, safety, and structural integrity. Delaying repairs can compromise visibility, increasing the risk of accidents and potential failure of vehicle inspections. Using the Permatex Windshield Repair Kit allows for quick, effective fixes, saving time and money while maintaining your vehicle’s safety and performance.
1.3 Benefits of Using the Permatex Kit
The Permatex Windshield Repair Kit provides a cost-effective, user-friendly solution for minor windshield damage. It includes all necessary tools, eliminating the need for additional purchases. The UV-curing resin ensures a strong, permanent bond, restoring clarity and preventing further damage. With no mixing required and a straightforward process, it’s ideal for DIY users. The kit’s compact design and ease of use make it accessible for anyone to achieve professional-quality repairs at home, saving money and time compared to professional services.

Understanding the Components of the Kit
The Permatex Windshield Repair Kit includes a syringe, plunger, adhesive disc, pedestal, curing strip, and repair compound, offering a comprehensive solution for minor windshield damage repair.
2.1 List of Items Included in the Kit
The Permatex Windshield Repair Kit contains essential components for effective repairs, including a syringe and plunger for applying the resin, an adhesive disc to create a seal, a pedestal for stabilizing the syringe, a curing strip to facilitate UV light exposure, and a small quantity of repair compound. Additionally, the kit provides clear instructions with photographs to guide users through each step of the process, ensuring a successful and professional-looking repair. All items are neatly organized to make the repair process straightforward and efficient.
2.2 Purpose of Each Component
The syringe and plunger are designed to precisely inject the repair compound into the damaged area. The adhesive disc creates a vacuum seal to prevent air bubbles and ensure proper resin flow. The pedestal stabilizes the syringe, maintaining consistent pressure during injection. The curing strip facilitates UV light exposure, essential for hardening the resin. The repair compound fills and bonds the glass, restoring clarity and strength. Each component plays a critical role in achieving a professional-quality windshield repair with minimal effort and expertise.
2.3 Safety Precautions with the Repair Compound
When using the Permatex repair compound, avoid direct sunlight and ensure the windshield temperature is between 50°F and 75°F (10°C to 25°C). Prevent the compound from contacting painted surfaces, as it may cause damage. Wear protective gloves and eyewear to avoid skin and eye irritation. Handle the syringe carefully to maintain control and avoid accidental spills. Follow the instructions precisely to ensure safe and effective application, minimizing risks during the repair process.
Preparing for the Repair
Ensure the windshield is clean and dry, and perform repairs in a shaded area with temperatures between 50°F and 75°F (10°C to 25°C) for optimal results.
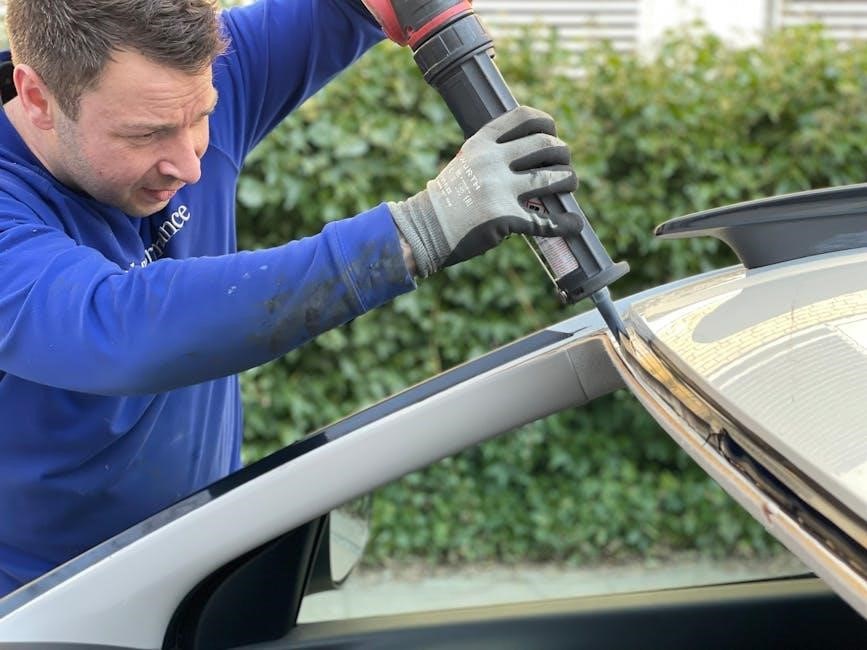
3.1 Choosing the Right Environment
For optimal results, perform the repair in a shaded area, avoiding direct sunlight, with the windshield temperature between 50°F and 75°F (10°C to 25°C). Ensure the surface is clean, dry, and free from contaminants. Avoid windy or dusty conditions to prevent debris interference. If possible, work in a garage or under a covered area to maintain stable conditions. Proper environmental preparation ensures the repair compound adheres effectively, promoting a strong and durable fix. This step is crucial for achieving professional-quality results with the Permatex kit.
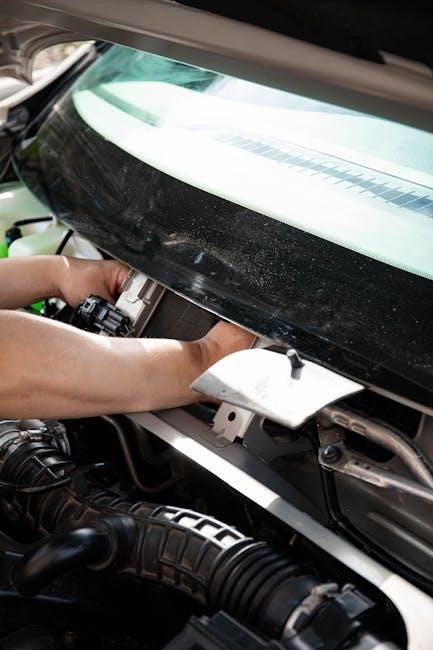
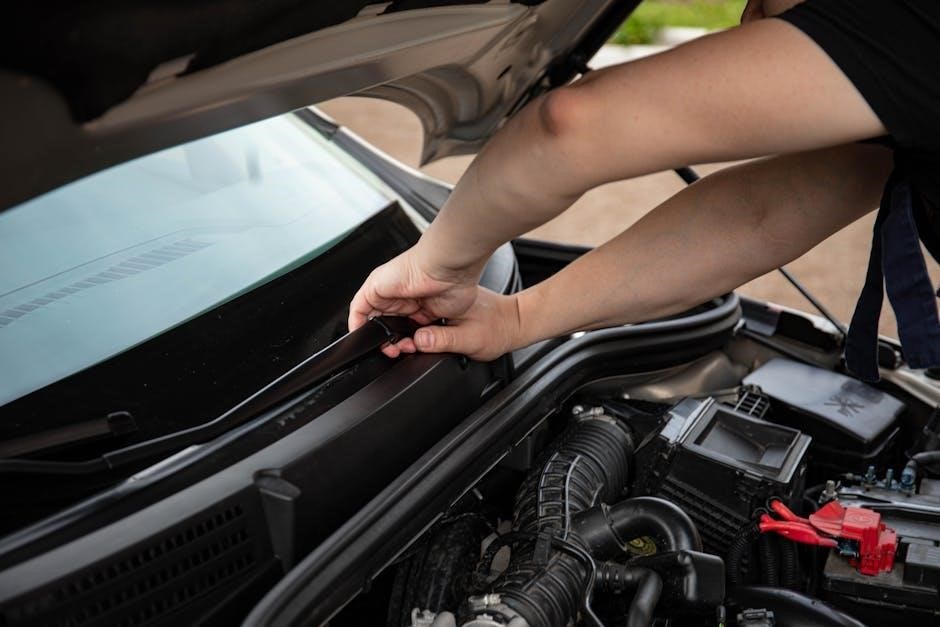
3.2 Cleaning the Damaged Area
Thoroughly clean the damaged area using a soft cloth and mild glass cleaner to remove dirt, oil, or debris. Avoid harsh chemicals or abrasive materials that may scratch the glass. Use a clean, dry section of the cloth to wipe away any residue, ensuring the surface is spotless. This step is essential for proper adhesion of the repair compound. A clean surface guarantees a stronger bond, leading to a more effective and long-lasting repair. Proper preparation ensures the best possible outcome with the Permatex kit.
3.3 Temperature Requirements for Repair
Perform the repair in a shaded area with the windshield temperature between 50°F and 75°F (10°C to 25°C). Avoid direct sunlight, as it may prematurely cure the resin. Ensure the surface is free from moisture and contaminants for optimal adhesion. Temperature stability is crucial for the repair compound to flow properly and cure effectively. Adhering to these conditions ensures a strong, durable bond and a successful repair outcome with the Permatex Windshield Repair Kit.

Step-by-Step Repair Process
The Permatex kit guides you through a detailed, step-by-step process, from preparing the surface to injecting the repair compound, ensuring a clear and durable windshield repair.
4.1 Applying the Adhesive Disc
Begin by cleaning the damaged area to ensure a proper bond. Peel the backing from the adhesive disc and press it firmly onto the center of the chip, ensuring it is level. This disc creates a seal for the repair compound, preventing air bubbles and allowing the resin to flow evenly. Proper alignment is crucial for effective repair, so align the disc precisely. Once applied, proceed to the next step with confidence, ensuring the disc adheres securely for optimal results.
4.2 Using the Syringe and Plunger
Filled the syringe with the repair compound, ensuring no air bubbles are present. Attach the syringe to the adhesive disc, creating a tight seal. Slowly squeeze the plunger to inject the compound into the chip, allowing it to spread evenly. Use a gentle, steady pressure to avoid introducing air bubbles. Pause occasionally to inspect and ensure the resin flows smoothly. This step is crucial for filling the damage completely and achieving a clear, durable repair. Monitor progress closely to avoid overfilling.
4.3 Injecting the Repair Compound
Attach the filled syringe to the adhesive disc and ensure a tight seal. Slowly depress the plunger to inject the repair compound into the chip, filling it evenly. Avoid introducing air bubbles by maintaining steady pressure. If bubbles form, gently tap the pedestal to eliminate them. Continue until the damage is completely filled. Use the pedestal to stabilize the syringe during injection. Allow the compound to spread naturally, ensuring full coverage for a clear and durable repair. Monitor the process closely to achieve optimal results.
4.4 Removing Air Bubbles
Gently tap the pedestal with your finger to bring air bubbles to the surface. Use the provided push pin to carefully prick and release any trapped bubbles. Repeat this process until no more bubbles rise. If necessary, re-inject a small amount of compound to fill any voids left by the bubbles. Smooth the area with a razor blade if needed. Ensure the repair is bubble-free before curing, as bubbles can affect clarity. Avoid over-tightening or excessive force, which may damage the glass further. Inspect under UV light to confirm all bubbles are removed.
4.5 Curing the Repair with UV Light
Exposure to direct sunlight or UV light is essential for curing the repair compound. Position the windshield in full sunlight, ideally at an angle to prevent shadowing. Use the provided curing strip to shield the repair area from direct sun rays, preventing overheating. Allow the compound to cure for 10-30 minutes, depending on UV intensity. Avoid parking in shaded areas during curing, as this may prolong the process. Once cured, inspect the repair under UV light to ensure proper adhesion and clarity. Avoid using the vehicle until the repair is fully cured to ensure durability. Proper curing ensures the repair is long-lasting and effective.
4.6 Final Inspection and Touch-ups
After curing, inspect the repair under UV light to ensure the compound has fully bonded and the area is clear. Check for any remaining bubbles or unevenness. If necessary, use a safety razor to gently scrape away excess resin. Avoid direct sunlight on the repaired area for at least 24 hours. Once satisfied, your windshield is ready for normal use. Proper curing ensures a strong, lasting repair that restores clarity and safety to your windshield. Always follow instructions for best results.

Post-Repair Care and Maintenance
Allow the repair to cure fully, avoiding direct sunlight for 24 hours. Check the seal for completeness and ensure no resin contacts painted surfaces. Regular inspections ensure long-term durability and safety.
5.1 Allowing Proper Curing Time
Proper curing time is essential for the repair to achieve its full strength and clarity. The Permatex kit requires the resin to cure in a shaded area, away from direct sunlight, for at least 15-30 minutes. For optimal results, allow the repair to cure for 24 hours before exposing the windshield to water, cleaning products, or extreme temperatures. This ensures the resin fully bonds with the glass, preventing moisture intrusion and ensuring long-term durability. Avoid rushing the process, as improper curing can lead to weak bonds or reduced visibility.
5.2 Avoiding Direct Sunlight Immediately
Direct sunlight should be avoided immediately after applying the Permatex Windshield Repair Kit. The UV resin in the kit is designed to cure with exposure to UV light, but premature or direct sunlight can cause uneven hardening or bubbles. Keep the windshield shaded during the initial curing phase to ensure proper adhesion and clarity. Allow the recommended curing time before exposing the windshield to direct sunlight to achieve a strong, long-lasting repair.
5.3 Checking for Complete Sealing
After the repair, ensure the windshield is completely sealed by inspecting the damaged area for any air bubbles or gaps. Use a visual inspection to verify clarity and proper adhesion of the resin. For added assurance, gently press around the repaired area with a soft cloth to check for leaks. Avoid exposing the windshield to direct sunlight immediately, as this can interfere with the curing process. Allow the repair to cure fully before using the windshield, ensuring a watertight and durable seal.
Common Mistakes to Avoid
Common mistakes include ignoring temperature guidelines, not removing air bubbles properly, and allowing resin to contact painted surfaces, which can cause damage or incomplete sealing.
6.1 Ignoring Temperature Guidelines
Ignoring temperature guidelines is a common mistake that can hinder the repair process. The Permatex Windshield Repair Kit requires the windshield to be between 50°F and 75°F (10°C to 25°C) for optimal results. Performing the repair in direct sunlight or extreme temperatures can cause the resin to cure improperly, leading to incomplete sealing or reduced clarity. Always ensure the windshield is within the recommended temperature range before starting the repair to achieve the best outcome and avoid further damage. Proper temperature control is crucial for a successful repair.
6.2 Not Removing Air Bubbles Properly
Failing to remove air bubbles during the repair process can lead to incomplete sealing and reduced clarity. The Permatex Windshield Repair Kit includes a syringe to inject the repair compound and remove air bubbles effectively. If bubbles remain, they can cause the repair to fail or leave visible imperfections. Properly removing air bubbles ensures the resin fills the damage completely, restoring the windshield’s integrity and clarity. Always follow the instructions carefully to avoid this common mistake and achieve a successful repair.
6.3 Allowing Resin to Contact Painted Surfaces
Allowing the repair resin to contact painted surfaces can cause damage or discoloration. The instructions explicitly warn against this, emphasizing the importance of containing the resin to the damaged glass area. Using a protective cloth or barrier around the repair site helps prevent accidental contact. Failure to follow this precaution may result in costly paint repairs or stubborn stains. Always ensure the resin is applied only to the windshield glass to avoid unnecessary damage and maintain your vehicle’s appearance.
Safety Precautions and Warnings
Handle the repair compound carefully to avoid skin and eye contact. Wear protective gloves and eyewear. Ensure proper ventilation and follow disposal instructions to prevent hazards.
7.1 Handling the Repair Compound Safely
Always wear protective gloves and eyewear when handling the repair compound to avoid skin and eye irritation. Ensure the area is well-ventilated to prevent inhaling fumes. Avoid letting the resin come into contact with painted surfaces, as it may cause damage. Perform repairs in a shaded area with the windshield temperature between 50°F and 75°F (10°C to 25°C). Follow the instructions carefully to prevent accidents and ensure proper curing of the compound using the provided UV light. Proper disposal of leftover materials is essential to maintain safety and environmental standards.
7.2 Avoiding Skin and Eye Contact
Wear protective gloves and eyewear to prevent skin and eye irritation when handling the repair compound. If contact occurs, flush with water immediately and seek medical attention if irritation persists. Avoid touching sensitive areas after handling the resin. Keep the compound away from children and pets. In case of accidental exposure, do not use household chemicals for treatment. Ensure proper ventilation to minimize inhalation of fumes. Follow safety guidelines to maintain a safe working environment during the repair process.
7.3 Proper Disposal of Materials
Dispose of leftover repair compound, syringes, and other materials responsibly. Do not discard in regular trash; instead, follow local regulations for hazardous waste. Keep materials out of reach of children and pets. Clean tools with approved solvents and dispose of rags properly. Ensure all empty packaging is recycled if possible. Proper disposal helps protect the environment and public health; Always adhere to community guidelines for waste management to maintain safety and sustainability during and after the repair process.

Comparing Permatex with Other Repair Kits
The Permatex Windshield Repair Kit stands out for its cost-effectiveness, user-friendly design, and professional results, making it a top choice among DIY windshield repair solutions available today.
8.1 Unique Features of the Permatex Kit
The Permatex Windshield Repair Kit is distinguished by its all-in-one design, providing everything needed for repairs, including a syringe, adhesive disc, and UV-curing compound. It requires no mixing or heat, making it user-friendly. The kit repairs bullseyes and star damage up to 1.25 inches, ensuring professional-grade results. Its UV resin cures naturally, avoiding the need for additional equipment. This makes it a convenient and efficient solution for minor windshield damage, offering long-lasting, air-tight repairs that restore clarity and integrity to the glass.
8.2 Cost-Effectiveness
The Permatex Windshield Repair Kit is a budget-friendly solution, priced under $20, making it significantly cheaper than professional windshield replacement, which can cost hundreds of dollars. By addressing minor chips and cracks early, the kit prevents further damage, potentially saving users from costly repairs. Its all-in-one design eliminates the need for additional tools or materials, offering excellent value for money. This cost-effectiveness, combined with its ease of use, makes it a practical choice for DIY windshield maintenance and repair.
8.3 User Reviews and Ratings
The Permatex Windshield Repair Kit has received highly positive reviews, with many users praising its effectiveness and ease of use. Rated an average of 4.5 out of 5 stars, customers highlight its ability to deliver professional-looking results for minor chips and cracks. Many users appreciate the clear, step-by-step instructions and the kit’s affordability. While a few noted challenges with resin curing, the majority found it a reliable solution for avoiding costly windshield replacements. Overall, it is widely recommended for DIY windshield repair.

When to Replace the Windshield
The Permatex kit repairs minor chips and cracks up to 1 1/4 inches. However, larger damage or chips in the driver’s line of sight may require full replacement for safety and legal compliance.
9.1 Assessing Damage Beyond Repair
Determine if windshield damage exceeds repair limits, such as cracks longer than 1 1/4 inches or spreading across the glass. Chips in the driver’s line of sight may necessitate replacement. If the damage compromises structural integrity or obstructs visibility, professional replacement is essential. Additionally, if the repair kit fails to seal the damage effectively, or if the glass is delaminated, replacement is the only safe option to ensure safety and legal compliance.
9.2 Legal and Safety Implications
If windshield damage is not properly repaired, it can lead to legal consequences, such as failing a vehicle inspection. Additionally, unsafe driving conditions may arise, as impaired visibility increases accident risks. Always ensure repairs meet safety standards, and if damage exceeds repair capabilities, replace the windshield promptly. Legal regulations vary by region, so check local requirements to avoid penalties. Safety should never be compromised, making professional replacement the best option when repairs are insufficient.
9.3 Professional Replacement Options
When windshield damage exceeds repair capabilities, professional replacement is essential. Certified technicians use advanced tools and high-quality materials to ensure a safe and durable installation. Modern windshields often feature specialized coatings and sensors, requiring expertise for proper replacement. Many auto glass shops offer warranties on their work, ensuring long-term reliability. Professional replacement guarantees proper sealing, maintaining the vehicle’s structural integrity and safety standards. It’s the best option for extensive damage, providing peace of mind and compliance with manufacturer specifications.

Troubleshooting Common Issues
Common issues include incomplete sealing, air bubbles, or resin not curing. Ensure proper cleaning, avoid temperature extremes, and follow instructions precisely for optimal repair results.
10.1 Repair Not Holding
If the repair fails to hold, ensure the surface was properly cleaned and free of contaminants. Verify the temperature was within the recommended range (50°F to 75°F). Check for air bubbles in the resin application, as they can weaken the bond. If the issue persists, reapply the repair compound, ensuring complete coverage. Allow the resin to cure fully under UV light before testing. If problems remain, consult a professional or consider windshield replacement if damage is extensive.
10.2 Resin Not Curing Properly
If the resin isn’t curing, ensure it’s exposed to direct sunlight or a UV light source as per instructions. Avoid curing in shaded areas or indirect light. Check the expiration date of the repair compound, as outdated resin may not cure effectively. Ensure the windshield temperature is within the recommended range (50°F to 75°F) during curing. If issues persist, reapply the resin and follow curing steps carefully. Consult the kit’s troubleshooting guide or contact Permatex support for assistance.
10.3 Bubbles Reappearing After Repair
If bubbles reappear after repair, it may indicate incomplete sealing or improper resin application. Inspect the damaged area for any debris or contamination. Clean the area thoroughly with a lint-free cloth and reapply a small amount of resin, ensuring proper pressure and alignment. Allow the resin to cure fully under UV light or direct sunlight. Avoid direct sunlight immediately after application to prevent premature curing. If bubbles persist, consider consulting a professional or repeating the repair process with a new resin application.
The Permatex Windshield Repair Kit is a cost-effective, easy-to-use solution for minor windshield damage, offering professional results with minimal effort and time.
11.1 Final Thoughts on the Permatex Kit
The Permatex Windshield Repair Kit is a reliable, cost-effective solution for addressing minor windshield damage. With its comprehensive instructions and all-inclusive components, it empowers users to achieve professional-quality repairs. The kit’s ease of use and effectiveness make it a valuable tool for maintaining windshield integrity, preventing further damage, and saving costs compared to professional replacements.
11.2 Encouragement for DIY Repair
Embrace the convenience and cost-effectiveness of DIY windshield repair with the Permatex Kit. Its user-friendly design and clear instructions empower car owners to tackle minor damage confidently. By following the step-by-step guide, you can save money on professional services and ensure timely repairs. DIY repair not only preserves your windshield’s integrity but also gives you the satisfaction of resolving the issue independently, avoiding the hassle and expense of professional intervention.
11.3 Importance of Regular Windshield Maintenance
Regular windshield maintenance is crucial for ensuring safety and clarity while driving. Addressing minor chips or cracks promptly prevents them from escalating into costly repairs or replacements. By incorporating the Permatex Windshield Repair Kit into your maintenance routine, you can extend the lifespan of your windshield and maintain its optical clarity. Regular checks and timely repairs not only enhance safety but also prevent environmental factors like moisture and temperature changes from worsening the damage, saving you money in the long run.